Workshops...find out if you like it first

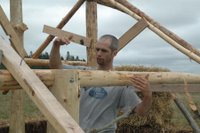
We can't recommend strawbale workshops enough. It will really help you figure out if you will enjoy building a strawbale building. We met Kim Thompson and joined one of her workshops last August to build Matt Black's greenhouse (he's pictured above with his greenhouse timberframe near Antigonish, NS as we were in the midst of raising the bale walls). Matt's wife was also present with their new baby, Sage. We have found that strawbale building is almost always a family affair. People of all ages can participate. The folks we met were loads of fun, the food was fabulous (that's a key to a good working party, btw), and we learned a tonne.

Matt used an existing concrete pad he has on his property, but it was too close to the ground to place the strawbales directly on (if they get wet from snow and back splashing rain, they mold and rot). We filled polypropelyne bags with clay rich soil, closed them using nails as pins, laid them flat around the perimeter and then tamped them down using a wide, homemade wooden hammer. These are called "earth bags." We only built a raised foundation, but many have built entire homes out of these bags and plastered them - they can look amazing.
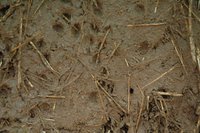
 After that, we began using the strawbales. Here you can see an image from our workshop of a mixing pit. Using strawbales covered in a hole-free tarp, you can create multiple pits in convenient locations to mix the clay slip you coat the bales with. We used the "french dip" method to coat the sides of the bales in the pits before we laid them on the foundation. A thorough coating of this milkshake-like clay mix on the straw is important to enable the next layer of thicker earth plaster to stick.You can also spray on the slip, if you can create or find an appropriate tool to do so (I mentioned the auto undercoating spray gun in a previous posting).
We stuffed clay-dipped bundles of straw in any gaps and tied each bale to the other bales beside it using poly-twine (much easier to work with than sisal twine).
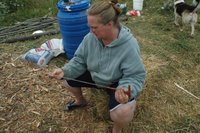
 External "pins" are added to strength the wall about every three feet. We notched lines into the wall vertically on opposing sides of the bale, then placed alder branches in the notches that we tied with poly-twine. Check out the picture of the bale-needle we used to tie them with. From there we made the scratch coat of earth plaster. This is done using a mix of chopped straw, clay-rich soil and sand. I'll add photos to my next posting. The romantic part of this stage is "the dance." One of the ways people mix this plaster is to roll the ingredients together on a tarp and then have people "dance" on it - kind of like the grape-crushing traditions of vineyards - only muddy. And no wine afterwards.
  Well, lots of w-h-i-n-e if you try to do a large structure this way because the romance wears off after a while. Most folks use a mortar mixer for larger structures. This layer is about an inch thick, and must only be applied if the layer of clay slip on the bales is moist (usually spritzed with water). If I remember correctly, you should "key" the surface in, creating divets to allow the next layer to adhere to it. We will be applying a final lime-earth mix to our home to protect it from the elements.
We didn't have time to finish all of Matt's greenhouse, but it was an enlightening experience.


0 Comments:
Post a Comment
<< Home